Connecting To A Third-Party Network From Azure Using NAT

An unfortunately common scenario is where you must create a site-to-site network connection with a third-party network from your Azure network using NAT. This post will explain a few solutions.

The Scenario

There are those out there who think that every implementation in The Cloud is 100% under your control and is cloud-ready. But sometimes, you must fit in with other people’s designs and you can’t use cool integrations such as Private Link or API. Sometimes you need to connect your network to a third party and they dictate the terms of the connection.

The connection is typically a site-to-site connection, usually VPN but I have seen ExpressRoute used. VPN means there are messy bits – you can control that with your own on-premises firewalls but you have no control over the VPN configuration of an externally owned firewall.

Site-to-site connections with a service provider means that there could be IP address overlap. The only way to handle that is to use NAT – and that is not always possible natively in the platform or it’s really badly documented.

Solution 1: On-Premises Relay

In this scenario, the third-party will make a connection to your on-premises network. NAT is implemented on the on-premises network to translate your private Azure address to some “public address” (it is routed only over the private connections).

The connection between on-premises and Azure could be VPN or ExpressRoute.

This design is useful in two situations:

  1. You are using ExpressRoute – the ExpressRoute Gateway does not offer NAT functionality.
  2. The third-party insists that you use some kind of VPN configuration that is not supported in Azure, for example, GRE.

The downside with this design is that might be additional latency between the third-party and your Azure network.

Solution 2: AWS Relay

Oh – did this post by an Azure MVP just mention AWS? Sure – there is a time and a place for everything.

This solution is similar to the on-premises relay solution but it replaces on-premises with AWS. This can be useful where:

  1. You want to minimise on-premises resources. AWS does support GRE so a VPN connection to a third-party that requires GRE can be handled in this way.
  2. You can use an AWS region that is close to either the third-party and/or your Azure region and minimise latency.

Note that the connection from AWS or Azure could be either VPN or ExpressRoute (with an ISP that supports Azure ExpressRoute and AWS Direct Connect).

The downside is that there is still “more stuff” and a requirement for skills that you might not have. On the plus side, it offers compatibility with reduced latency.

Solution 3: Azure Relay
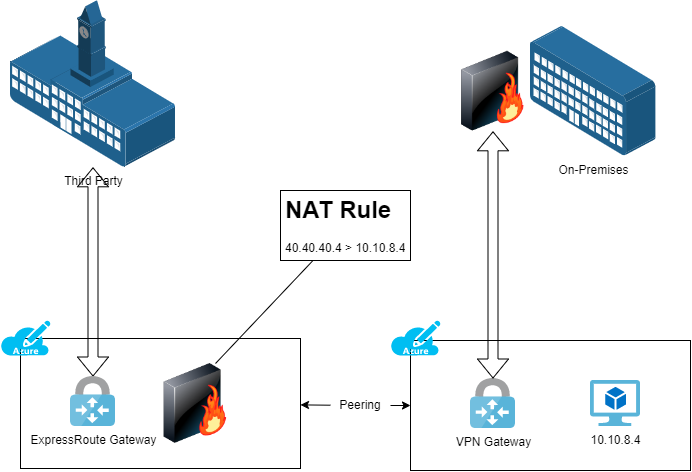
In this design, the third-party makes a connection to your Azure network(s) using ExpressRoute. But as usual, you must implement a NAT rule. The ExpressRoute Gateway cannot natively implement NAT. That requires that you must deploy “an appliance” (NVA or Linux VM with NAT tables).

In the above design, there is a route table associated with the GatewaySubnet of the ExpressRoute Gateway. An user-defined route with a prefix of 40.40.40.4 will forward to the appliance as the next hop. A user-defined route on the VM’s subnet with a prefix of the third-party network(s) will use the appliance as the next hop.

This design allows you to use ExpressRoute to connect to the third-party but it also allow you to implement NAT.

Solution 4: VPN Gateway & NAT

Other than using some modern solution, such as authenticated API over HTTPS, this is probably “the best” scenario in terms of Azure resource simplicity.

The third-party connects to your Azure network using a site-to-site VPN. The connection is terminated in Azure using a VPN Gateway. The Azure VPN Gateway is capable of supporting NAT rules. Unfortunately, that’s where things begin to fall apart because of the documentation (quality and completeness).

This is a simple scenario where the third-party needs access to an IP address (VM other otherwise) hosted in your Azure network. That internal address of your Azure resource must be translated to a different External IP Address.

As long as your VPN Gateway is VpnGw2/VpnGw2Az or higher, then you can create NAT rules in the Gateway. The scenario that I have described requires a confusingly-named egress NAT rule – you are translating an internal IP address(es) to an external IP address(es) to abstract the internal address(es) for ingress traffic. An ingress NAT rule translates an external IP address(es) to an internal address(es) to abstract the external address(es) for ingress traffic.

The Terraform code for my scenario is shown below: I want to make my Azure resource with 10.10.8.4 available externally as 40.40.40.4 on TCP 443:

Once you have the NAT rule, you will associate it with the Connection resource for the VPN.

And that’s it – 10.10.8.4 will be available as 40.40.40.4 on TCP 443 to the third-party – no other connection can use this NAT rule unless it is associated with it.

Solution 5 – NVA & NAT

This is alm ost the same as the previous example, but an NVA is used instead of the Azure VPN Gateway, maybe because you like their P2S VPN solution or you are using SD-WAN. The NAT rules are implemented in the NVA.

Connecting Azure Hub-And-Spoke Architectures Together

In this post, I will explain how you can connect multiple Azure hub-and-spoke (virtual data centre) deployments together using Azure networking, even across different Azure regions.

There is a lot to know here so here is some recommended reading that I previously published:

If you are using Azure Virtual WAN Hub then some stuff will be different and that scenario is not covered fully here – Azure Virtual WAN Hub has a preview (today) feature for Any-to-Any routing.

The Scenario

In this case, there are two hub-and-spoke deployments:

  • Blue: Multiple virtual networks covered by the CIDR of 10.1.0.0/16
  • Green: Another set of multiple virtual networks covered by the CIDR of 10.2.0.0/16

I’m being strategic with the addressing of each hub-and-spoke deployment, ensuring that a single CIDR will include the hub and all spokes of a single deployment – this will come in handy when we look at User-Defined Routes.

Either of these hub-and-spoke deployments could be in the same region or even in different Azure regions. It is desired that if:

  • Any spoke wishes to talk to another spoke it will route through the local firewall in the local hub.
  • All traffic coming into a spoke from an outside source, such as the other hub-and-spoke, must route through the local firewall in the local hub.

That would mean that Spoke 1 must route through Hub 1 and then Hub 2 to talk to Spoke 4. The firewall can be a third-party appliance or the Azure Firewall.

Core Routing

Each subnet in each spoke needs a route to the outside world (0.0.0.0/0) via the local firewall. For example:

  • The Blue firewall backend/private IP address is 10.1.0.132
  • A Route Table for each subnet is created in the Blue deployment and has a route to 0.0.0.0/0 via a virtual appliance with an IP address of 10.1.0.132
  • The Greenfirewall backend/private IP address is 10.2.0.132
  • A Route Table for each subnet is created in the Green deployment and has a route to 0.0.0.0/0 via a virtual appliance with an IP address of 10.2.0.132

Note: Some network-connected PaaS services, e.g. API Management or SQL Managed Instance, require additional routes to the “control plane” that will bypass the local firewall.

Site-to-Site VPN

In this scenario, the organisation is connecting on-premises networks to 1 or more of the hub-and-spoke deployments with a site-to-site VPN connection. That connection goes to the hub of Blue and to Green hubs.

To connect Blue and Green you will need to configure VNet Peering, which can work inside a region or across regions (using Microsoft’s low latency WAN, the second-largest private WAN on the planet). Each end of peering needs the following settings (the names of the settings change so I’m not checking their exact naming):

  • Enabled: Yes
  • Allow Transit: Yes
  • Use Remote Gateway: No
  • Allow Gateway Sharing: No

Let’s go back and do some routing theory!

That peering connection will add a hidden Default (“system”) route to each subnet in the hub subnets:

  • Blue hub subnets: A route to 10.2.0.0/24
  • Green hub subnets: A route to 10.1.0.0/24

Now imagine you are a packet in Spoke 1 trying to get to Spoke 4. You’re sent to the firewall in Blue Hub 1. The firewall lets the traffic out (if a rule allows it) and now the packet sits in the egress/frontend/firewall subnet and is trying to find a route to 10.2.2.0/24. The peering-created Default route covers 10.2.0.0/24 but not the subnet for Spoke 4. So that means the default route to 0.0.0.0/0 (Internet) will be used and the packet is lost.

To fix this you will need to add a Route Table to the egress/frontend/firewall subnet in each hub:

  • Blue firewall subnet Route Table: 10.2.0.0/16 via virtual appliance 10.2.0.132
  • Red firewall subnet Route Table: 10.1.0.0/16 via virtual appliance 10.1.0.132

Thanks to my clever addressing of each hub-and-spoke, a single route will cover all packets leaving Blue and trying to get to any spoke in Red and vice-versa.

ExpressRoute

Now the customer has decided to use ExpressRoute to connect to Azure – Sweet! But guess what – you don’t need 1 expensive circuit to each hub-and-spoke.

You can share a single circuit across multiple ExpressRoute gateways:

  • ExpressRoute Standard: Up to 10 simultaneous connections to Virtual Network Gateways in 1+ regions in the same geopolitical region.
  • ExpressRoute Premium: Up to 100 simultaneous connections to Virtual Network Gateways in 1+ regions in any geopolitical region.

FYI, ExpressRoute connections to the Azure Virtual WAN Hub must be of the Premium SKU.

ExpressRoute is powered by BGP. All the on-premises routes that are advertised propagate through the ISP to the Microsoft edge router (“meet-me”) in the edge data centre. For example, if I want an ExpressRoute circuit to Azure West Europe (Middenmeer, Netherlands – not Amsterdam) I will probably (not always) get a circuit to the POP or edge data centre in Amsterdam. That gets me a physical low-latency connection onto the Microsoft WAN – and my BGP routes get to the meet-me router in Amsterdam. Now I can route to locations on that WAN. If I connect a VNet Gateway to that circuit to Blue in Azure West Europe, then my BGP routes will propagate from the meet-me router to the GatewaySubnet in the Blue hub, and then on to my firewall subnet.

BGP propagation is disabled in the spoke Route Tables to ensure all outbound flows go through the local firewall.

But that is not the extent of things! The hub-and-spoke peering connections allow Gateway Sharing from the hub and Use Remote Gateway from the spoke. With that configuration, BGP routes to the spoke get propagated to the GatewaySubnet in the hub, then to the meet-me router, through the ISP and then to the on-premises network. This is what our solution is based on.

Let’s imagine that the Green deployment is in North Europe (Dublin, Ireland). I could get a second ExpressRoute connection but:

  • That will add cost
  • Not give me the clever solution that I want – but I could work around that with ExpressRoute Global Reach

I’m going to keep this simple – by the way, if I wanted Green to be in a different geopolitical region such as East US 2 then I could use ExpressRoute Premium to make this work.

In the Green hub, the Virtual Network Gateway will connect to the existing ExpressRoute circuit – no more money to the ISP! That means Green will connect to the same meet-me router as Blue. The on-premises routes will get into Green the exact same way as with Blue. And the routes to the Green spokes will also propagate down to on-premises via the meet-me router. That meet-me router knows all about the subnets in Blue and Green. And guess what BGP routers do? They propagate – so, the routes to all of the Blue subnets propagate to Green and vice-versa with the next hop (after the Virtual Network Gateway) being the meet-me router. There are no Route Tables or peering required in the hubs – it just works!

Now the path from Blue Spoke 1 to Green Spoke 4 is Blue Hub Firewall, Blue Virtual Network Gateway, <the Microsoft WAN>, Microsoft (meet-me) Router, <the Microsoft WAN>, Green Virtual Network Gateway, Green Hub Firewall, Green Spoke 4.

There are ways to make this scenario more interesting. Let’s say I have an office in London and I want to use Microsoft Azure. Some stuff will reside in UK South for compliance or performance reasons. But UK South is not a “hero region” as Microsoft calls them. There might be more advanced features that I want to use that are only in West Europe. I could use two ExpressRoute circuits, one to UK South and one to West Europe. Or I could set up a single circuit to London to get me onto the Microsoft WAN and connected this circuit to both of my deployments in UK South and West Europe. I have a quicker route going Office > ISP > London edge data center > Azure West Europe than from Office > ISP > Amsterdam edge data center > Azure West Europe because I have reduced the latency between me and West Europe by reducing the length of the ISP circuit and using the more-direct Microsoft WAN. Just like with Azure Front Door, you want to get onto the Microsoft WAN as quickly as possible and let it get you to your destination as quickly as possible.

Verifying Propagated BGP Routes on Azure ExpressRoute

An important step of verifying or troubleshooting communications over ExpressRoute is checking that all the required routes to get to on-premises or WAN subnets have been propagated by BGP to your ExpressRoute Virtual Network Gateway (and the connected virtual networks) by the on-premises edge router.

The Problem

Routing to Azure is often easy; your network admins allocate you a block of private address space on the “WAN” and you use it for your virtual network(s). They add a route entry to that CIDR block on their VPN/ExpressRoute edge device and packets can now get to Azure. The other part of that story is that Azure needs to know how to send packets back to on-premises – this affects responses and requests. And I have found that this is often overlooked and people start saying things like “Azure networking is broken” when they haven’t sent a route to Azure so that the Azure resources connected to the virtual network(s) can respond.

The other big cause is that the on-premises edge firewall doesn’t allow the traffic – this is the #1 cause of RDP/SSH to Azure virtual machines not working, in my experience.

I had one such scenario where a system in Azure was “not-accessible”. We verified that everything in Azure was correct. When we looked at the propagated BGP routes (via ExpressRoute) then we saw the client subnets were not included in the Route Table. The on-prem network admins had not propagated those routes so the Azure ExpressRoute Gateway did not have a route to send clients responses to. Once the route was propagated, things worked as expected.

Finding the Routes

There are two ways you can do this. The first is to use PowerShell:

Get-AzExpressRouteCircuitRouteTable -DevicePath Primary -ExpressRouteCircuitName TheNameOfMyCircuitResourceInAzure -PeeringType AzurePrivatePeering -ResourceGroupName TheNameOfTheResourceGroupTheCircuitResourceIsIn

The command takes quite a while to run. Eventually, it will spit out the full route table. If there are lots of routes (there could be hundreds if not thousands) then they will scroll beyond the buffer of your console. So modify the command to send the output to a text file:

Get-AzExpressRouteCircuitRouteTable -DevicePath Primary -ExpressRouteCircuitName TheNameOfMyCircuitResourceInAzure -PeeringType AzurePrivatePeering -ResourceGroupName TheNameOfTheResourceGroupTheCircuitResourceIsIn > BgpRouteTable.txt

Unfortunately, it does not create a CSV format by default but one could format the output to get something that’s easier to filter and manipulate.

You can also use the Azure Portal where you can view routes from the Route Table and export a CSV file with the contents of the Route Table. Open the ExpressRoute Circuit and browse to Peerings.

Click Azure Private, which is the site-to-site ExpressRoute connection.

Now a pop-up blade appears in the Azure Portal called Private Peering. There are three interesting options here:

  • Get ARP records to see information on ARP.
  • Get Route Table – more on this in a second.
  • Get Route Table Summary to get a breakdown/summary of the records, including neighbor, version, status ASN, and a count of routes.

We want to see the Route Table so you click that option. Another pop-up blade appears and now you wait for several minutes. Eventually, the screen will load up to 200 of the entries from the Route Table. If you want to see the entire list of entries or you want an export, click Download. A CSV file will download via your browser, with one line per route from the Route Table, including every one of the routes.

Search the Route Table and look for a listing that either lists the on-premises/WAN subnet or includes it’s space, for example, a route to 10.10.0.0/16 includes a subnet called 10.10.10.0/24.

BGP with Microsoft Azure Virtual Networks & Firewalls

In this article, I want to explain how important BGP is in Azure networking, even if you do not actually use BGP for routing, and the major role it plays in hub-and-spoke architectures and deployments with a firewall.

What is BGP?

I was never the network guy in an on-premises deployment. Those 3 letters, BGP, were something someone else worried about. But in Azure, the server admin becomes a network admin. Most of my work in Azure is networking now. And that means that the Border Gateway Protocol (BGP) is important to me now.

BGP is a means of propagating routes around a network. It’s a form of advertising or propagation that spreads routes to one or more destinations one hop at a time. If you think about it, BGP is like word-of-mouth.

A network, Subnet A, is a destination. Subnet A advertises a route to itself to a neighbour network, Subnet B. Subnet B advertises to its neighbours, including Subnet C, that it knows how to get to the original subnet, Subnet A. And the propagation continues. A subnet at the far end of the LAN/WAN, Subnet D, knows that there is another subnet far away called Subnet A and that the path to Subnet A is back via the propagating neighbour, Subnet C. Subnet C will then forward the traffic to Subnet B, which in turn sends the traffic to the destination subnet, Subnet A.

Azure and BGP

Whether you use BGP in your on-premises network or not, there will be a pretty high percentage chance that you will use BGP in Azure virtual networking – we’ll get to that in a few moments.

If you create a site-to-site VPN connection, you have the option to integrate your on-premises BGP routing with your Azure virtual network(s). If you use ExpressRoute, you must use BGP. In both cases, BGP routes are propagated from on-premises, informing your Azure virtual network gateway of all the on-premises networks that it can route to over that connection.

But BGP Is Used Without BGP

Let’s say that you are deploying a site-to-site VPN connection to Azure and that you do not use BGP in your configuration. Instead, you create a Local Network Gateway in Azure to define your on-premises networks. The virtual network gateway will load those networks from the Local Network Gateway and know to route across the associated VPN tunnel to get to those destinations.

And here’s where things get interesting. Those routes must get advertised around the virtual network.

If a virtual machine in the virtual network needs to talk to on-premises, it needs to know that the route to that on-premises subnet is via the VNet Gateway in the gateway subnet. So, the route gets propagated out from the gateway subnet.

Let’s scale that situation out a bit to a hub & spoke architecture. We have a site-to-site connection with or without BGP being used. The routes to on-premises are in the VNet Gateway and are propagated out to the subnets in the hub VNet that contains the VNet Gateway. And in turn, the routes are advertised to peered virtual networks (spokes) and their subnets. Now a resource on a subnet in a spoke virtual network has a route to an on-premises virtual network – across the peering connection and to the virtual network gateway.

Note: in this scenario, the hub is sharing the VNet gateway via peering, and the spoke is configured in peering to use the remote VNet gateway.

Bi-Directional

Routing is always a 2-way street. If routes only went one way, then a client could talk to a server, but the server would not be able to talk to the client.

If we have BGP enabled VPN or ExpressRoute, then Azure will propagate routes for the spoke subnets back down through peering and to the VNet Gateway. The VNet Gateway will then propagate those routes back to on-premises.

If you do not have BGP VPN (you are statically setting up on-premises routes in the Local Network Gateway) then you will have to add the address space of each spoke subnet to the on-premises VPN appliance(s) so that they know to route via the tunnel to get to the spokes. The simple way to do that is to plan your Azure networking in advance and have a single supernet (a /16, for example) instead of a long list of smaller subnets (/24s, for example) to configure.

Control & Security

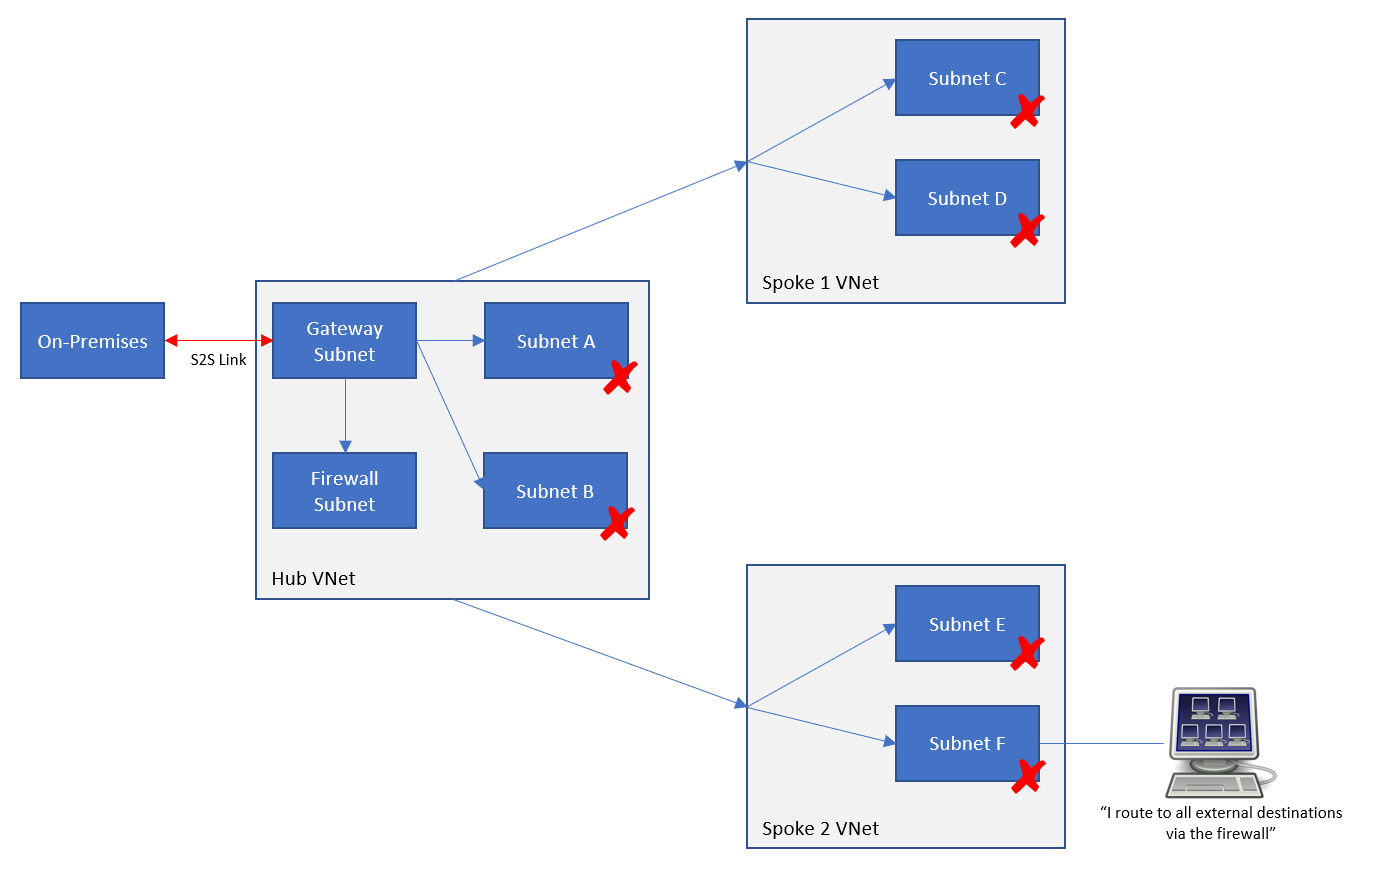
Let’s say that you want to add a firewall to your hub. You want to use this firewall to isolate everything outside of Azure from your hub and spoke architecture, including the on-premises networks. You’ve done some research and found that you need to add a route table and a user-defined route to your hub and spoke subnets, instructing them that the route to on-premises is through the VNet Gateway.

Now you need to do some reading – you need to learn (1) how Azure routing really works (not how you think it works) and (2) how to troubleshoot Azure routing. FYI, I’ve been living in this world non-stop for the last 10 months.

What you will probably have done is configured your spokes with a route to 0.0.0.0/0 via the internal/backend IP address of the firewall. You are assuming that will send all traffic to anywhere via the Firewall. Under the covers, though, routes to on-premises are still propagating from the VNet Gateway to all the subnets in your hub and spoke architecture. If on-premises was 192.168.1.0/24 and your spoke machine wanted to route to on-premises, then the Azure network fabric will compare the destination with the routes that it has in a hidden route table – the only place you can see this is in Effective Routes in a VM NIC Azure resource. You have a UDR for 0.0.0.0/0 via the firewall. That’s a 0-bit match for any destinations in 192.168.1.0/24. If that was the only route in the subnet, then that route would be taken. But we are sending a packet to 192.168.1.x and that is a 24-bit match with the propagated route to 192.1681.0/24. And that’s why the response from the spoke resource will bypass the firewall and go straight to the VNet Gateway (via peering) to get to on-premises. That is not what you expected or wanted!

Note: the eagle-eyed person that understands routing will know that there will be other routes in the subnet, but they are irrelevant in this case and will confuse the explanation.

The following works even if you do not use BGP with a site-to-site VPN!

To solve this problem, we can stop propagation – we can edit the route table resources in the internal Azure subnets (or pre-do this in JSON) and disable BGP route propagation. The result of this is that the routes that the VNet Gateway were pushing out to other subnets will stop being propagated. Now if we viewed the effective routes for a spoke subnet, we’d only see a route to the firewall and the firewall is now responsible for forwarding traffic to on-premises networks to the VNet Gateway.

It is important to understand that this disabling of propagation affects the propagation only in 1 direction. Routes from the VNet Gateway will not be propagated to subnets with propagation disabled. However, ALL subnets will still propagate routes to themselves back to the VNet Gateway – we need on-premises to know that the route to these Azure subnets is still via the Gateway.

More work will be required to get the Gateway Subnet to route via the firewall, but that’s a whole other topic! We’re sticking to BGP and propagation here.

The Firewall and BGP Propagation

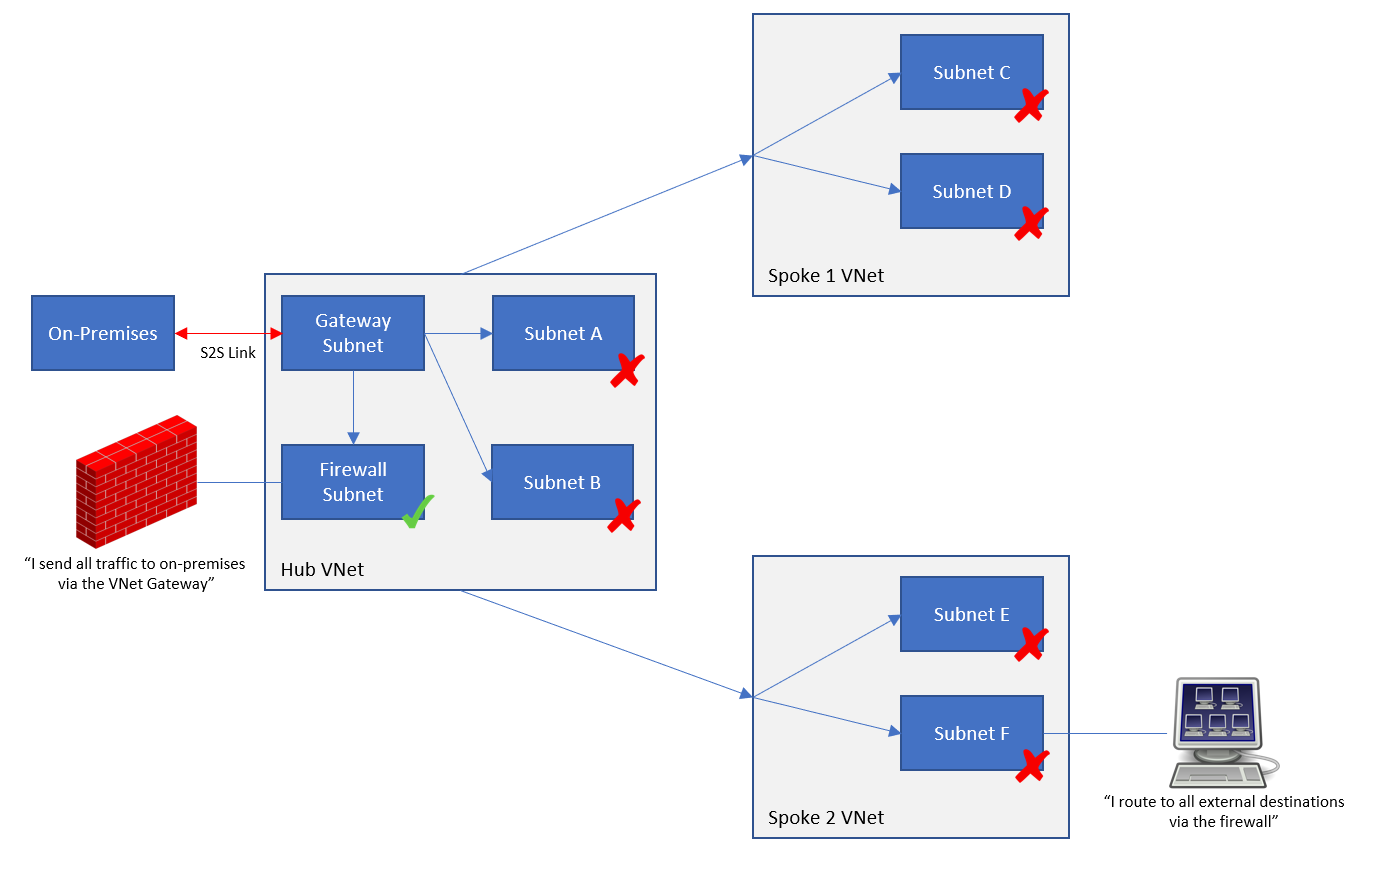
Let’s make a mistake, shall we? It will be useful to get a better understanding of the features. We shall add a route table to the firewall subnet and disable BGP route propagation. Now the resource in the spoke subnet wants to send something to an on-premises network. The local subnet route table instructs it to send all traffic to external destinations (0.0.0.0/0) via the firewall. The packets hit the firewall. The firewall tries to send that traffic out and … it has only one route (a simplification) which is to send 0.0.0.0/0 to Internet.

By disabling BGP propagation on the firewall subnet, the firewall no longer knows that the route to on-premises networks is via the virtual network gateway. This is one of those scenarios where people claim that their firewall isn’t logging traffic or flows – in reality, the traffic is bypassing the firewall because they haven’t managed their routing.

The firewall must know that the on-premises networks (a) exist and (b) are routes to via the VNet Gateway. Therefore, BGP propagation must be left enabled on the firewall subnet (the frontend one, if you have a split frontend/backend firewall subnet design).

Not Just Firewalls!

I’m not covering it here, but there are architectures where there might be other subnets that must bypass the firewall to get back to on-premises. In those cases, those subnets must also have BGP propagation left enabled – they must know that the on-premises networks exist and that they should route via the VNet Gateway.

Creating an Azure Service for Slow Moving Organisations

In this post, I will explain how you can use Azure’s Public IP Prefix feature to pre-create public IP addresses to access Azure services when you are working big/government organisations that can take weeks to configure a VPN tunnel, outbound firewall rule, and so on.

In this scenario, I need a predictable IP address so that means I must use the Standard SKU address tier.

The Problem

It normally only takes a few minutes to create a firewall rule, a VPN tunnel, etc in an on-premises network. But sometimes it seems to take forever! I’ve been in that situation – you’ve set up an environment for the customer to work with, but their on-premises networking team(s) are slow to do anything. And you only wish that you had given them all the details that they needed earlier in the project so their configuration work would end when your weeks of engineering was wrapping up.

But you won’t know the public IP address until you create it. And that is normally only created when you create the virtual network gateway, Azure Firewall, Application Firewall, etc. But what if you had a pool of Azure public IP addresses that were pre-reserved and ready to share with the network team. Maybe they could be used to make early requests for VPN tunnels, firewall rules, and so on? Luckily, we can do that!

Public IP Prefix

An Azure Public IP Prefix is a set of reserved public IP addresses (PIPs). You can create an IP Prefix of a certain size, from /31 (2 addresses) to /24 (256 addresses), in a certain region. The pool of addresses is a contiguous block of predictable addresses. And from that pool, you can create public IP addresses for your Azure resources.

In my example, I want a Standard tier IP address and this requires a Standard tier Public IP Prefix. Unfortunately, the Azure Portal doesn’t allow for this with Public IP Prefix, so we need some PowerShell. First, we’ll define some reused variables:

$rgName = "test"
$region = "westeurope"
$ipPrefixName = "test-ipfx"

Now we will create the Publix IP Prefix. Note that the length refers to the subnet mask length. In my example that’s a /30 resulting in a prefix with 4 reserved public IP addresses:

$ipPrefix = New-AzPublicIpPrefix -Name $ipPrefixName -ResourceGroupName $rgName -PrefixLength 30 -Sku Standard -Location $region

You’ll note above that I used Standard in the command. This creates a pool of static Standard tier public IP addresses. I could have dropped the Standard, and that would have created a pool of static Basic tier IP addresses – you can use the Azure Portal to deploy Basic tier Public IP Prefix and public IP addresses from that prefix. The decision to use Standard tier or Basic tier affects what resources I can deploy with the addresses:

  • Standard: Azure Firewall, zone-redundant virtual network gateways, v2 application gateways/firewalls, standard tier load balancers, etc.
  • Basic static: Basic tier load balancers, v1 application gateways/firewalls, etc.

Note that the non-zone redundant virtual network gateways cannot use static public IP addresses and therefore cannot use Public IP Prefix.

Creating a Public IP Address

Let’s say that I have a project coming up where I need to deploy an Application Firewall and I know the on-premises network team will take weeks to allow outbound access to my new web service. Instead of waiting until I build the application, I can reserve the IP address now, tell the on-premises firewall team to allow it, and then work on my project. Hopefully, by the time I have the site up and running and presented to the Internet by my Application Firewall, they will have created the outbound firewall rule from the company network.

Browse to the Public IP Prefix and make sure that it is in the same region as the new virtual network and virtual network gateway. Open the prefix and check Allocated IP Addresses in the Overview. Make sure that there is free capacity in the reserved block.

Now I can continue to use my variables from above and create a new public IP address from one of the reserved addresses in the Public IP Prefix:

New-AzPublicIpAddress -Name "test-vpn-pip" -ResourceGroupName $rgName -AllocationMethod Static -DomainNameLabel "test-vpn" -Location $region -PublicIpPrefix $ipPrefix -Sku Standard

Use the Public IP Address

I now have everything I need to pass onto the on-premises network team in my request. In my example, I am going to create a v2 Application Firewall.

Once I configure the WAF, the on-premises firewall will (hopefully) already have the rule to allow outbound connections to my pre-reserved IP address and, therefore, my new web service.

Cannot Create a Basic Tier Virtual Network Gateway in Azure

There is a bug in the Azure Portal that prevents you from selecting a virtual network when you pick the Basic Tier of the virtual network gateway, and you are forced into selecting the more expensive VpnGw1. I’ll show you how to workaround this bug in this post.

Background

I recently ran a hands-on Azure class in London. Part of the class required deploying & configuring a VPN gateway in the West Europe region. I always use the Basic tier because:

  • It’s cheaper – $26.79 for Basic versus $141.36 for VpnGw1 per month
  • That’s what most (by a long shot) of my customers deploy in production because it meets their needs.

I’ve had a customer in Northern Ireland report the same problem in North Europe.

The process goes like this:

  1. You select VPN gateway type
  2. Select Route-Based
  3. Select Basic as the SKU
  4. Then you attempt to select the virtual network that you want to use – it already has a gateway subnet
  5. You cannot continue because the virtual network is greyed out

image

The error shown is:

The following issues must be fixed to use this virtual network: The VPN gateway cannot have a basic SKU in order for it to coexist with an existing ExpressRoute gateway.

In all cases so far, the subscriptions have been either brand new CSP/trial subscriptions with no previous resources, or my lab subscription where I’ve used a new virtual network to demonstrate this scenario – and I have never deployed ExpressRoute in any subscription.

Workaround

Credit where credit is due – some of my attendees last week figured out how to beat the UI bug.

  1. Close the Choose Virtual Network blade if it is open.
  2. Select the VpnGw1 tier gateway in the Create Virtual Network Gateway blade – don’t worry, you won’t be creating it if you don’t want to pay the price.
  3. Click Choose A Virtual Network
  4. Select your virtual network
  5. Change the SKU of the gateway back to Basic
  6. Finish the wizard

image

I know – it’s a daft UI bug, but the above workaround works.