An Azure architecture review is something I’ve done many times. Some are focused on networking. Some take a broader look at governance, security, and disaster recovery. Some are urgent — a customer has a problem and needs to understand the full picture before they can fix it. Others are scheduled health checks. The nature of each engagement varies, but the findings? They’re remarkably consistent.
After completing several Azure architecture reviews across very different organisations – different sizes, sectors, and levels of Azure maturity – I’ve noticed the same issues surfacing time and again. I thought it was worth documenting them, because if these problems appear this consistently, they’re likely to appear in your environment too.
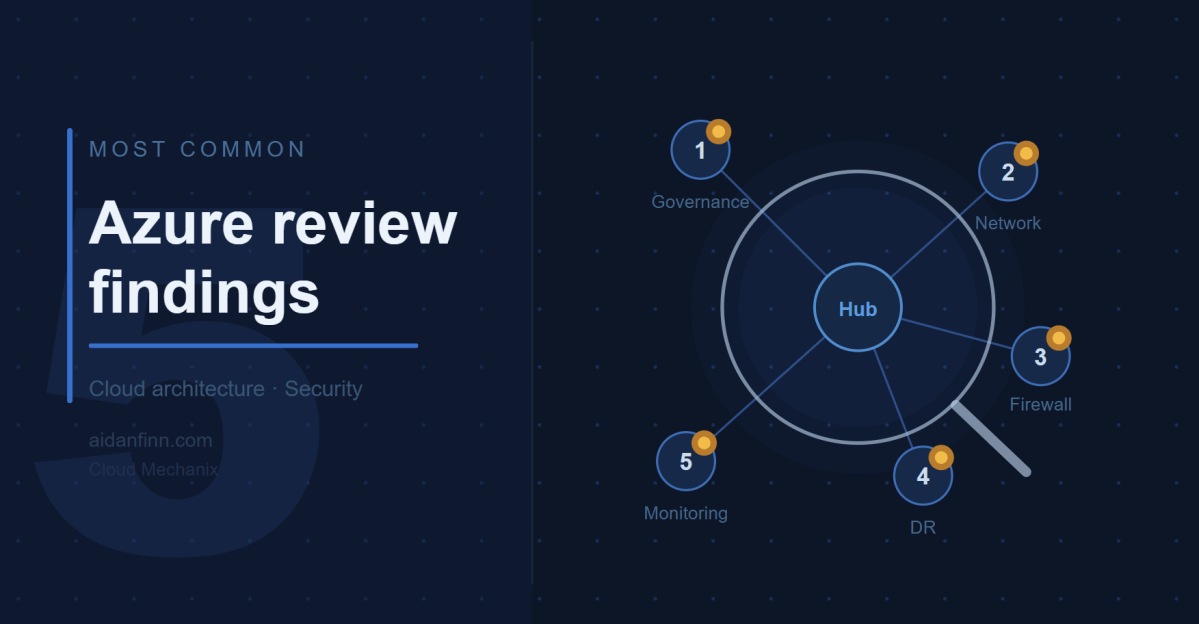
Here are the five most common findings.
1. Governance Is Either Missing or Broken
This one appears in every single review. Without exception.
The most common anti-pattern is the “everything in one subscription” model. I understand how it happens – an IT manager kicks off a cloud migration, picks up a subscription, and starts deploying things. It works, for a while. Then the environment grows, the resource groups multiply, and suddenly you have a sprawling mess where cost management is a nightmare, RBAC delegations are a headache, and nobody can tell which resources belong to which workload.
The Microsoft Cloud Adoption Framework (CAF) has a clear answer to this: Landing Zones. One subscription per workload. No cost. No catch. The result is a level of granularity that simplifies cost management, role assignment, quota management, naming, and troubleshooting in one move.
Beyond subscriptions, I typically find that Management Groups haven’t been set up correctly – or at all. Azure Policy is either absent or consists of a handful of default assignments nobody has reviewed. Naming standards are inconsistent, making the environment harder to read and operate at scale.
The fix isn’t a multi-year transformation project. The fix is a minimum viable product: get the right structure in place, assign sensible policies, and improve from there. I’ve designed starter governance architectures in a single afternoon that gave organisations a solid foundation to build on. I’ve written previously about how I interpret and apply the CAF with customers, and why it’s never too late to apply it – even if you’ve been in Azure for years.
My company, Cloud Mechanix, offers a Cloud Strategy consulting service built around the CAF that gets the right foundations in place without the overhead of a months-long engagement.
2. The Network Architecture Is Overly Complex and Doesn’t Enforce Zero Trust
The second finding is closely related to the first. When governance is weak, networks tend to be large, flat, and complicated.
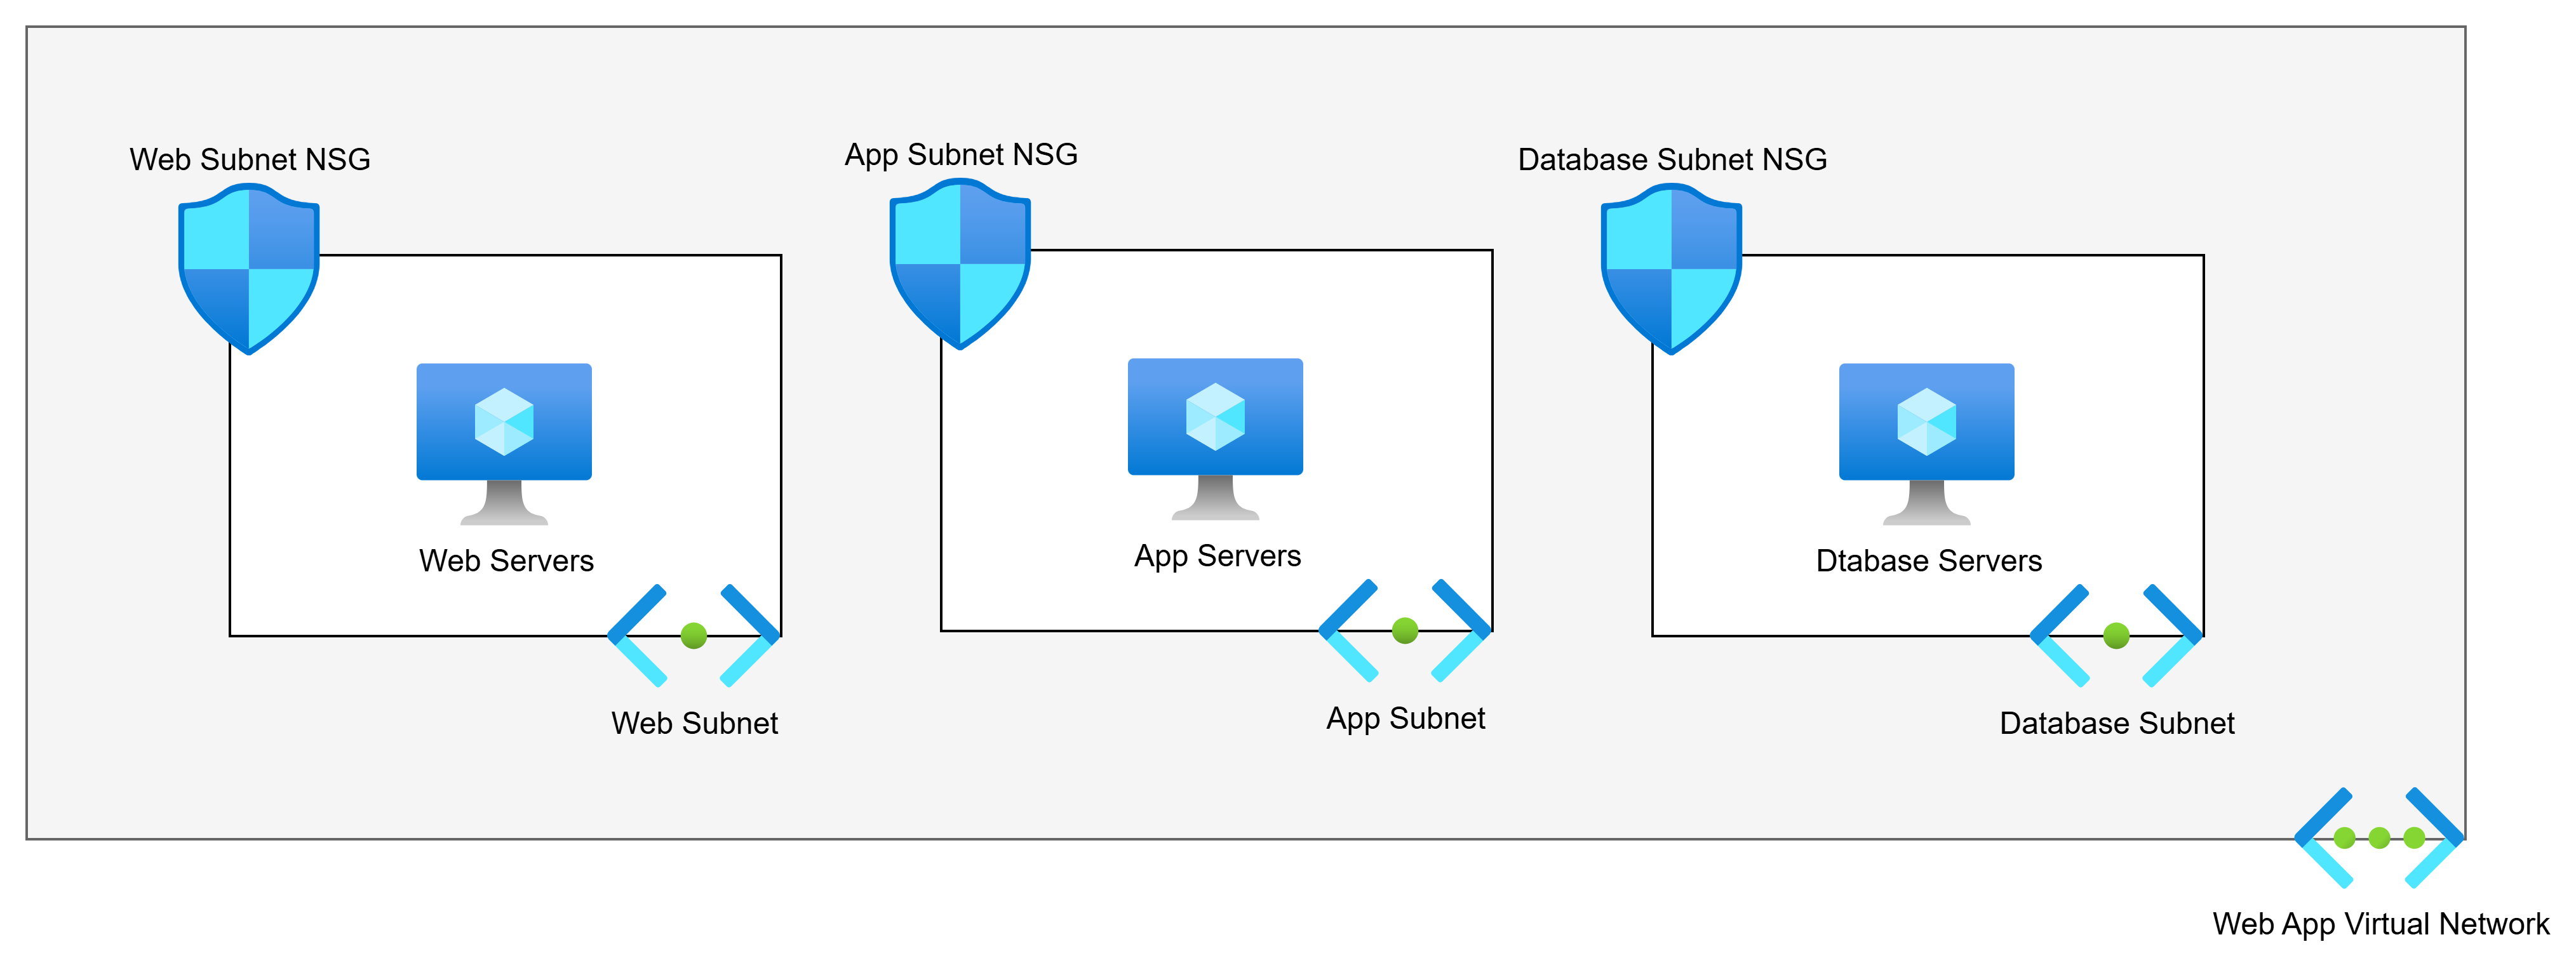
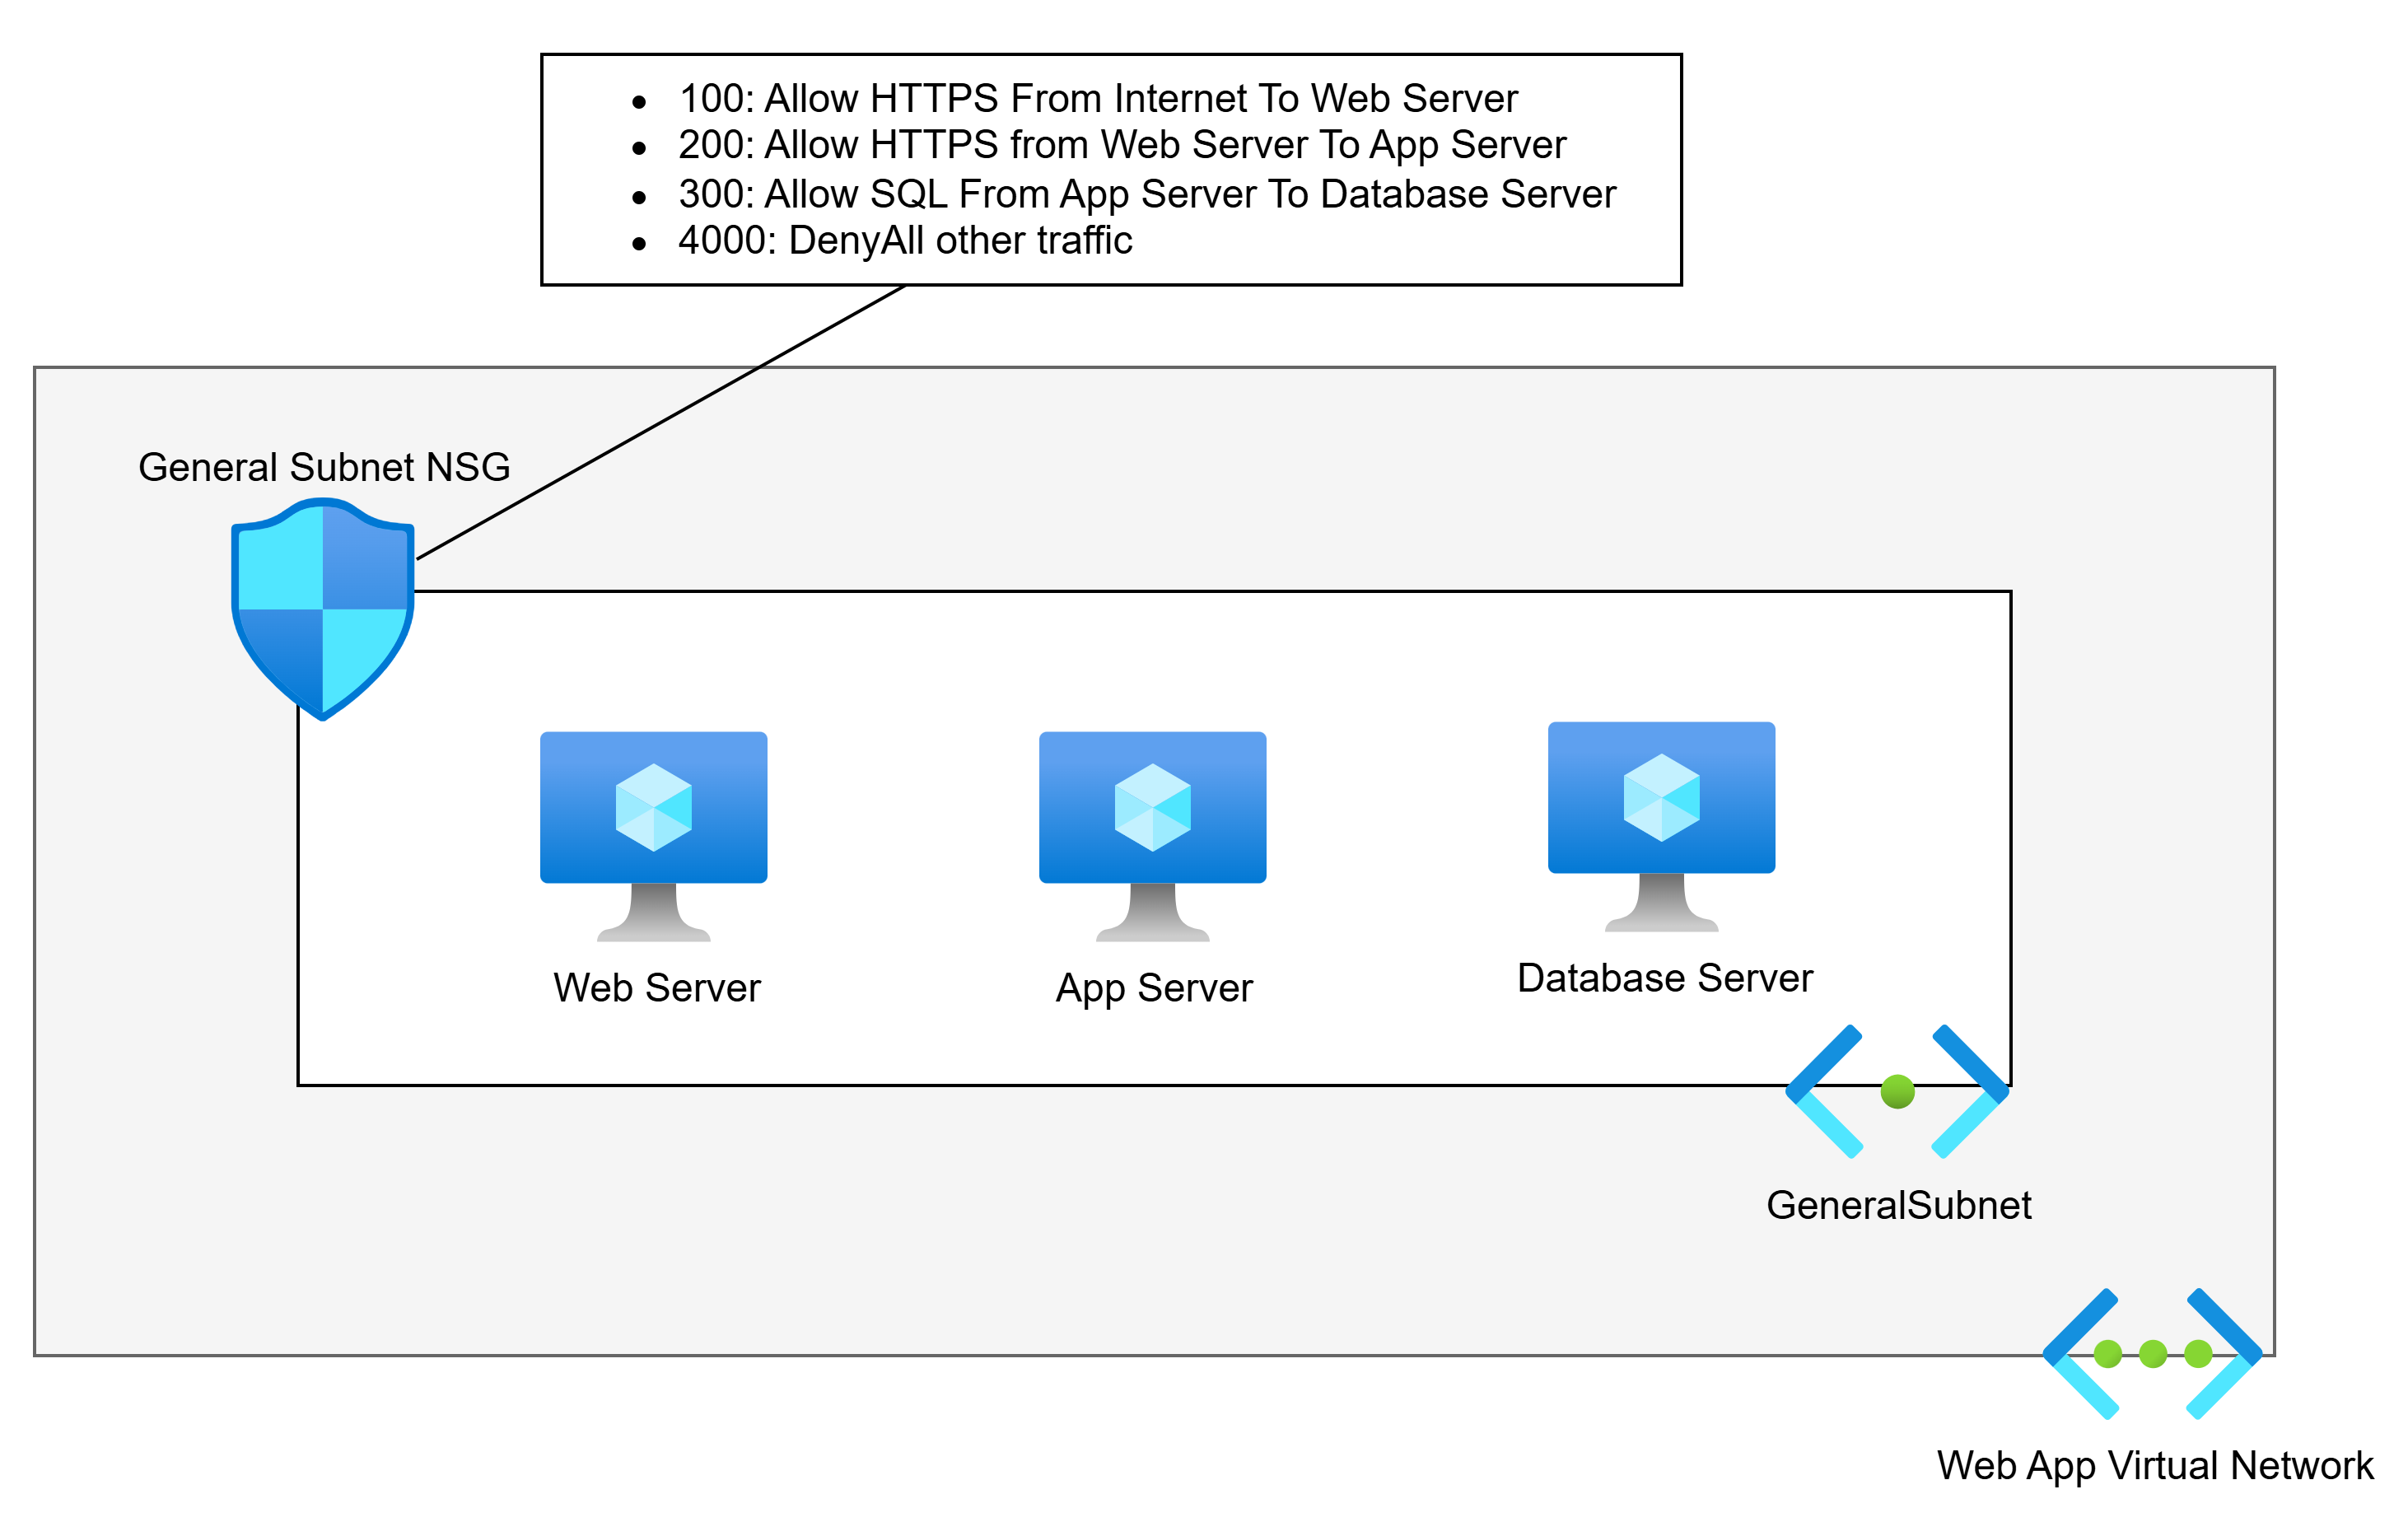
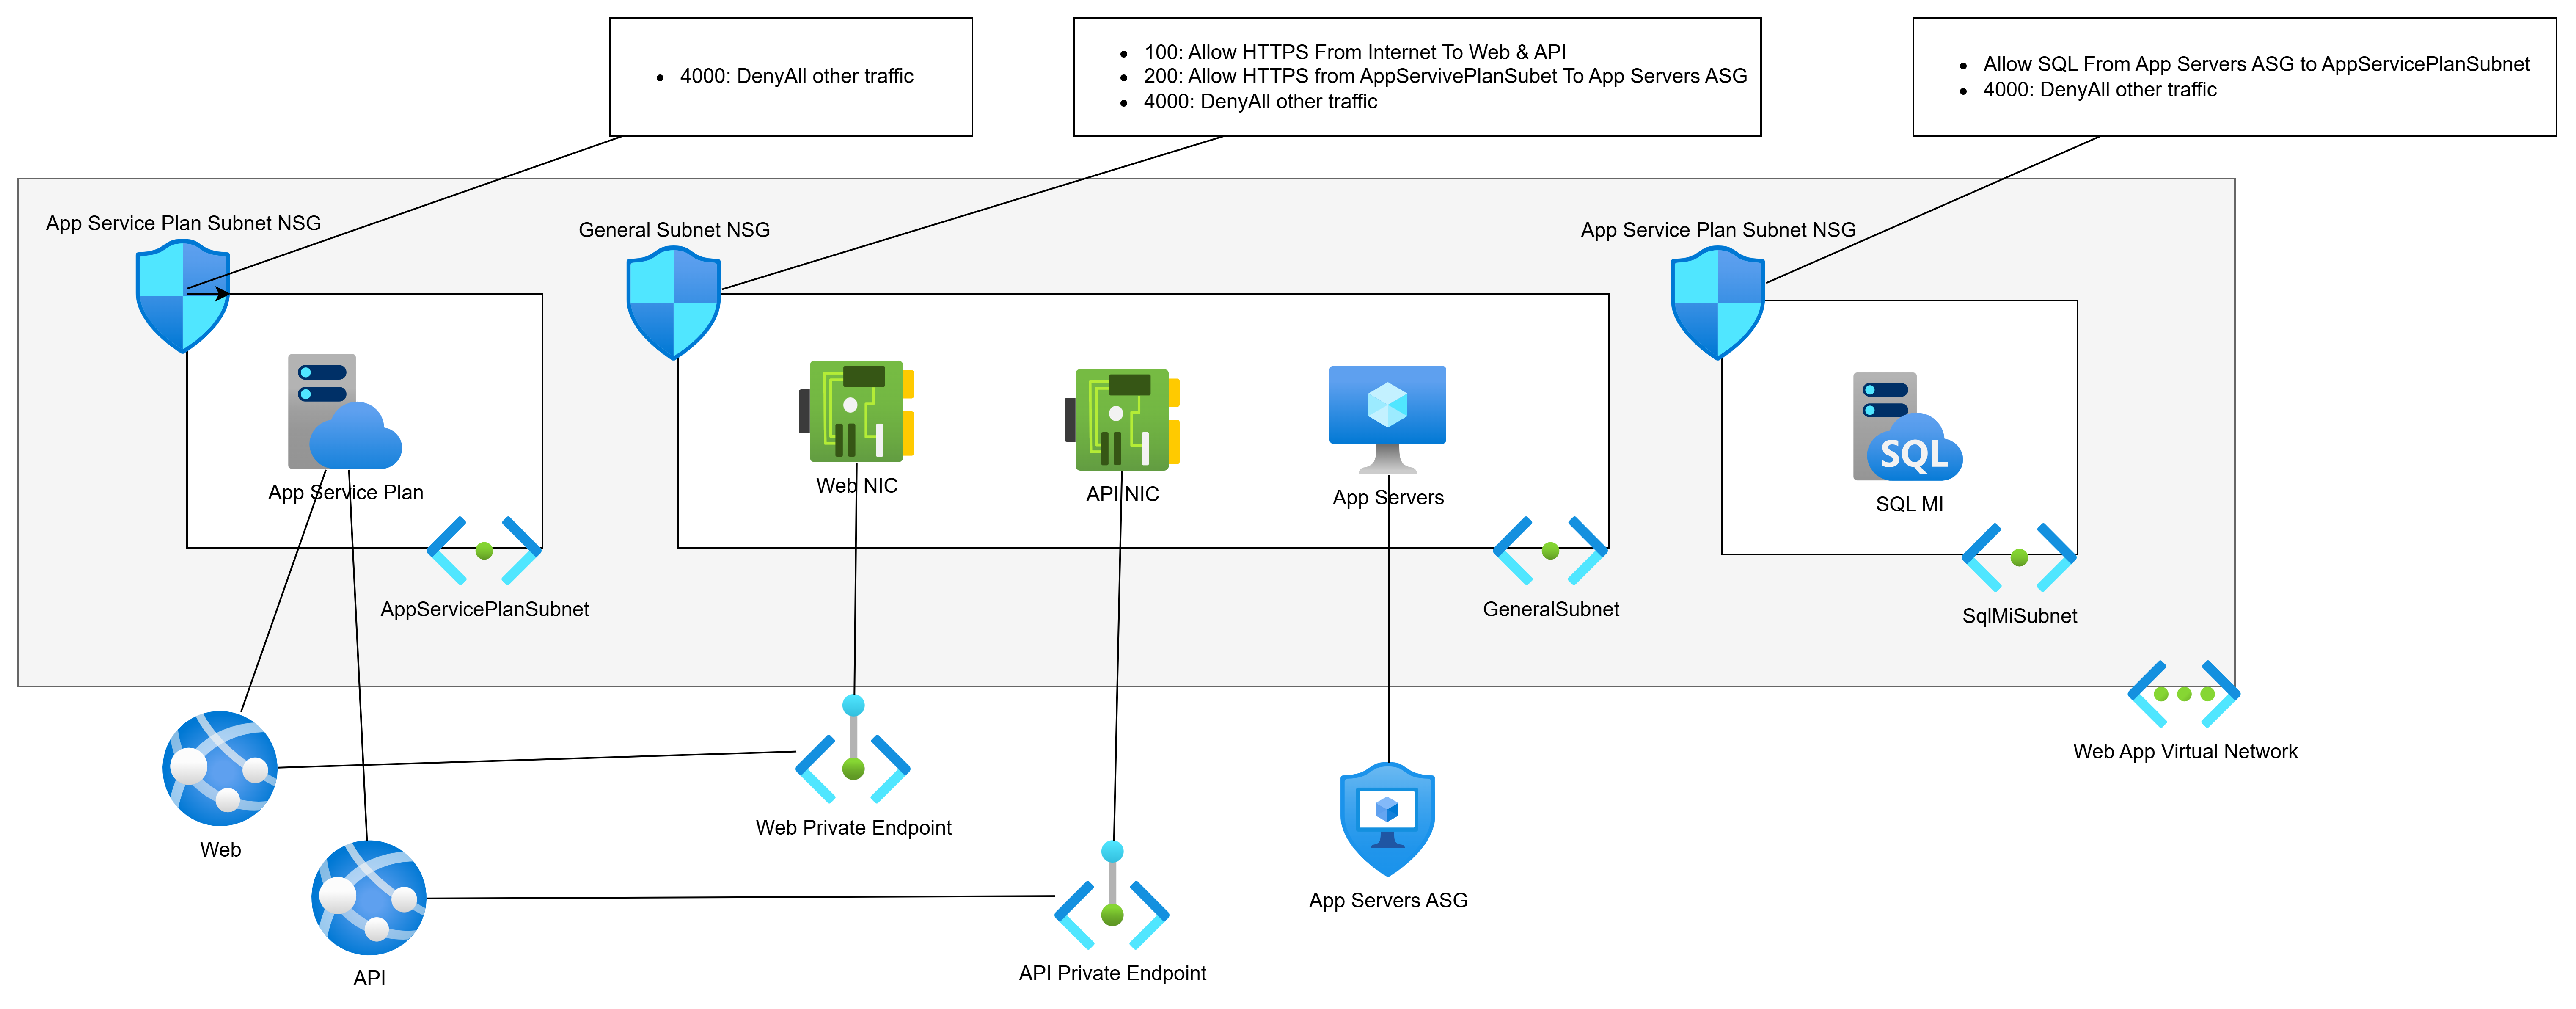
The most common pattern I encounter is what I call the “big VNet” design. Everything lives in one or two large Virtual Networks. Multiple workloads share the same address space. Route Tables get bigger and bigger as more exceptions are added. The network becomes unpredictable. Nobody is entirely sure what path traffic takes from A to B.
The security implication of this is significant. Without workload isolation, without proper routing via a central firewall, and without meaningful NSG enforcement, the environment defaults to a “full trust” model. Every workload can, in principle, reach every other workload. That is the opposite of Zero Trust.
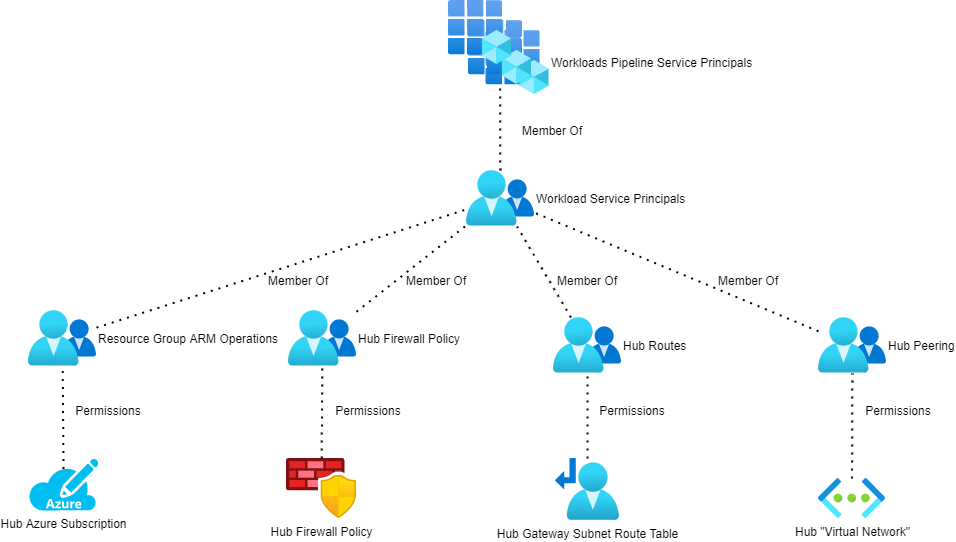
The right design is a proper hub-and-spoke architecture, with application Landing Zones providing the granularity needed to enforce isolation. Each workload gets its own small Virtual Network, peered with the hub. The hub contains the firewall, connectivity resources, and nothing else. Traffic between spokes goes through the firewall and is subject to rules and IDPS inspection. I covered this in more depth in There Is More To Azure Networking Than Connectivity & Security.
Azure Virtual Network Manager (AVNM) makes this scalable. Automatic peering, routing, and IP Address Management mean that a new workload Landing Zone can be connected correctly with minimal manual effort. Cloud Mechanix has published a Bicep module for AVNM if you want a head start. We also do a fixed-price 5 day review of your (selected) Azure networks.
3. The Firewall Has Significant Limitations
I review a lot of firewalls. Very few of them are doing the job that was intended when they were deployed.
The problems vary. In some environments, the firewall is only inspecting a fraction of the traffic. The rest bypasses it entirely because the Route Tables aren’t configured correctly, or because workloads are co-located in the hub where they communicate directly. In others, the firewall is a single instance in a single Availability Zone with no redundancy. One data centre issue and the organisation loses its primary security control.
Network Security Groups are another recurring issue. They are either missing from most subnets, configured with overly permissive rules, or duplicated inconsistently across the environment. In several environments I’ve reviewed, a single NSG was associated with just one subnet while all others had open traffic. That’s not a security boundary. That’s a gap.
WAF configurations also warrant attention. It’s not unusual to find a Web Application Firewall deployed in a way that places unnecessary load on the network firewall, or where the WAF itself has no high availability and is restricted to a single Availability Zone.
There is rarely a simple fix here. These issues tend to be symptomatic of a broader architectural problem – the network was built incrementally without a coherent design. The right answer, in most cases, is a rebuild using a proper hub-and-spoke design with a cloud-native, scalable firewall. If your team needs to get up to speed on how to design this correctly, Cloud Mechanix runs a Designing Secure Azure Networks course for exactly that purpose.
4. Disaster Recovery Is Backup-Based and Wouldn’t Survive a Real Incident
This one concerns me the most.
Almost universally, the disaster recovery capability I encounter in reviews is backup-based rather than replication-led. On the surface, this looks like disaster recovery – data is being backed up, and some of those backups are geo-replicated. But look at what would actually happen if a major incident occurred, and the picture changes quickly.
Recovery Time Objectives are measured in days or weeks rather than hours. Recovery Point Objectives are up to 24 hours because backups run once a day. Multiple backup solutions introduce complexity and inconsistency. Retention periods are short, meaning a ransomware attack that went undetected for several weeks could render the backups useless. Active Directory is being restored from backup, which is widely regarded as error-prone and risky. And in several environments, the disaster recovery region hasn’t been pre-built or secured to the same standard as production.
The regulatory stakes are rising. EU NIS2 makes clear that subject organisations must demonstrate tested recovery plans, reasonable recovery objectives, and appropriate governance. Backup-based disaster recovery will be difficult to defend to a regulator following a major incident. I explored the distinction between backup, resiliency, and genuine disaster recovery in Backup Versus Resiliency Versus Disaster Recovery – worth a read if you’re trying to explain the difference to stakeholders.
The right direction is a replication-led strategy with a warm secondary Azure region. Azure Site Recovery handles virtual machine replication. Azure Backup with geo-redundant replication handles retention and clean-room restores. Infrastructure-as-code ensures that the secondary environment stays consistent with production. And critically – it should be tested regularly, with documented, automated recovery plans.
Disaster recovery should be treated as a core business risk management capability, not an IT optimisation exercise.
5. Monitoring and Security Visibility Are Inadequate
The last finding is perhaps the least glamorous, but it enables everything else.
Across the environments I’ve reviewed, visibility is typically poor. Virtual Network Flow Logs are not enabled. Defender for Cloud is either unused or operating with a limited set of plans that don’t reflect the actual risk profile of the workloads. Subscription-level diagnostic logs and activity logs aren’t being forwarded to a central Log Analytics Workspace. Alerts – whether for threat intelligence signals, IDPS events, or operational anomalies – are either absent or minimal.
This matters for two reasons. First, without visibility, security incidents go undetected. The assumption that no alerts means no problems is dangerously wrong. The assumption should be the opposite. Second, troubleshooting complex connectivity issues without Flow Logs, firewall logs, or PaaS diagnostics is genuinely difficult. I’ve helped diagnose problems that should have taken minutes but took hours because the logging was never turned on.
The fix here isn’t particularly expensive. Virtual Network Flow Logs with Traffic Analytics, a centralised Log Analytics Workspace, Defender for Cloud with appropriate plans enabled, and a sensible set of alerts will transform the visibility of an Azure environment. These should be baseline requirements in any well-governed deployment, not optional extras.
A Pattern Worth Noting
Reading back through that list, there’s a common thread. Each of these findings is a consequence of deploying Azure without a framework. Without a governance strategy, without a landing zone architecture, without a security policy – teams make decisions in isolation, workloads accumulate, and complexity grows in ways that nobody fully intended.
The Cloud Adoption Framework exists precisely to avoid this. It’s not a lengthy consulting exercise. Done right, it provides a practical process for building Azure correctly – one that starts with business motivations, produces a clear architecture, and enables continuous improvement. Cloud Mechanix has developed its own interpretation of the CAF that keeps the process lean and focused on results rather than documentation.
If any of the above findings sound familiar, it may be worth taking stock.
Is Your Azure Environment on the Right Track?
If the findings in this post ring any bells, a structured Azure architecture review is the fastest way.
Cloud Mechanix offers a Fixed-Rate Cloud Environment Review – an expert-led review of your Azure environment, delivered in five business days. The scope is agreed upfront, access is read-only, and the output is a comprehensive report with clear, prioritised recommendations. No vague observations. No 200-page documents that nobody reads.
Whether the concern is security, governance, network architecture, disaster recovery, or the broader picture – get in touch and we can take it from there.